Friday, January 31, 2014

Free software to protect personal folders without Deleting and Reading

0 comments


Protected Folder

The Most Advanced and Easiest Folder Protection Tool


  • No Worries of Data Theft by Malicious Behavior
  • No Worries of Privacy Leaks on Shared Computer
  • Multiple Protection Levels for Different Needs
  • Super Easy to lock folder

Posted Image


What does
Protected Folder do?
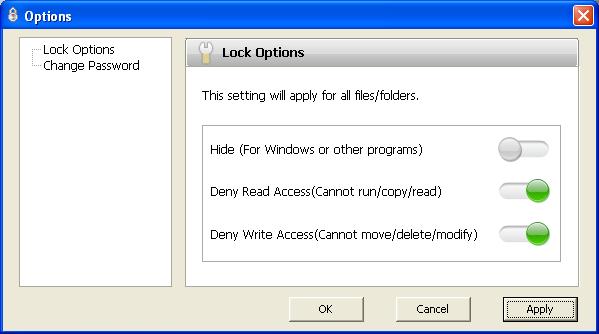
Protected Folder is a folder / file locker which protects user's privacy and important data from theft, loss or leaks. To lock folder and file, just drag and drop them into Protected Folder's safety box and you can hide and protect them from being viewed or modified. Protected Folder is an ideal folder locker if you are concerned with the security of you private or important data.


Posted Image


Download Latest Version Here


Thanks for coming by and taking your time to read this post :) I hope you have learnt something today and shared this. Now I'd love to hear from you. Got any views, thoughts and questions related to the post? I'm all ears here. Add your comment.


AutoGK (Auto Gordian Knot) 2.55 - DVD to AVI/DivX/XVid Ripper in very easy-to-use interface

0 comments


P


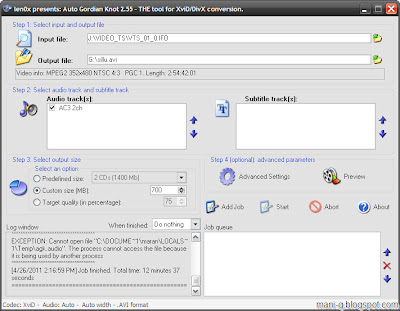
AutoGK includes everything you need to rip DVD to AVI/DivX/XVid in very easy-to-use interface. It also supports other MPEG2 sources, such as HDTV, DVB captures and transport streams.


AutoGK contains following codecs and tools

- VirtualDubMod 
- AviSynth & AviSynth Filters
- DGMPGDec
- VobSub
- XviD
- and Auto Gordian Knot (of course)


Features of AutoGK (Auto Gordian Knot):

- DVD, Mpeg2, transport streams (including multi-program ones) input sources
- XviD or DivX output formats
- AC3, DTS, PCM, MPA input audio tracks
- AC3, DTS, CBR MP3 or VBR MP3 output audio tracks
- two audio tracks in AVI
- external (vobsub) or internal (burnt-in) subtitles (with support of forced subs)
- HDTV input/output resolutions(upto 1920x***) and frame rates (50/60fps)
- automatic crop and resize based on compressibility of the source to achieve best results
- automatic detection of input source: PAL, NTSC, FILM, HYBRID
- automatic deinterlacer and IVTC
- automatic split into CD-sized chunks for main video and external subs


Changes in AutoGK 2.55 :

- Finally we're at a point when a stable version is ready!
- XviD bundled was still 1.3.0 somehow, which is updated to 1.2.1
- ColorMatrix filter updated


Download Here


Thanks for coming by and taking your time to read this post :) I hope you have learnt something today and shared this. Now I'd love to hear from you. Got any views, thoughts and questions related to the post? I'm all ears here. Add your comment.


How to send top secret E-mail that will self-destruct after being read once

0 comments


Privnote

  1. Create a note and get a link
  2. Copy the link and send it to whom you want to read the note
  3. The note will self-destruct after being read


About Privnote

Have you ever wanted to send confidential information within your work environment, to family or friends, but were afraid to do so over the internet, because some malicious hacker could be spying on you?
Privnote is a free web based service that allows you to send top secret notes over the internet. It's fast, easy, and requires no password or user registration at all.
Just write your note, and you'll get a link. Then you copy and paste that link into an email (or instant message) that you send to the person who you want to read the note. When that person clicks the link for the first time, they will see the note in their browser and the note will automatically self-destruct; which means no one (even that very same person) can read the note again. The link won't work anymore.

You can optionally choose to be notified when your note is read by leaving your email and a reference for the note.


Go Here


Thanks for coming by and taking your time to read this post :) I hope you have learnt something today and shared this. Now I'd love to hear from you. Got any views, thoughts and questions related to the post? I'm all ears here. Add your comment.


FortiClient - New antivirus software with a variety of facilities

0 comments


FortiClient Features - Windows


Download Here


Thanks for coming by and taking your time to read this post :) I hope you have learnt something today and shared this. Now I'd love to hear from you. Got any views, thoughts and questions related to the post? I'm all ears here. Add your comment.


Winternals ERD Commander ( DaRT ) or Windows Password Key for Recovering PC Administrator Password

0 comments

Do you have this annoyance, forgot administrator password for Windows 7/Vista/XP computer and now you are worried that you have to reinstall system in order to regain access to your computer? It does happen to most of us or you are helping people get out of this. There are many ways for Administrator password recovery, reinstall system isn’t a wise choice as it will lose your data.

Using E.R.D. Commander to recover administrator password

You can recover your forgotten password using Lock Smith utility which is part of ERD Commander tool by win internals.

The Locksmith Wizard of Microsoft Diagnostics and Recovery Toolset ( DaRT ) 7.0 allows you to change the password of any account in the local operating system Windows 7, you can get it from Microsoft website of somewhere you know.This is very helpful if you don’t have a password reset disk. Try to follow these steps

1. Download and Install DaRT 7.0 , then Creating a Recovery CD/DVD with it.

2. Start your computer and enter into Bios Setup by Pressing F2. Change your boot preferences to boot from CD /DVD.

3. Insert the CD / DVD DaRT 7.0 drive in the locked computer.

4. The computer starts from this disk, when you see the dialog box System Recovery Options, select Microsoft @Diagnostics and Recovery Toolset,
Next, choose Locksmith

5. In the Locksmith Wizard, click next to continue.
Then select the account you want to change the password, entering the new password and confirm. Click Finish to close the wizard.

6. In the window Diagnostics and Recovery Toolset click the Close dialog box and the System Recovery Options then click Restart .

7. Remove the CD/DVD and then wait for Windows to load and log on with administrator account using the new password set.

The following lists some other problems that can be solved using the utilities and wizards that are provided in the Microsoft Diagnostics and Recovery Toolset.
  • Edit the Registry
  • Regain access to a system
  • Diagnose a system failure
  • Salvage and repair partitions or volumes
  • Recover deleted files
  • Erase disks or volumes
  • Search for particular files
  • Browse drives
  • Perform administrative tasks to manage the computer
  • Configure TCP/IP
  • Uninstall Windows hotfixes and service packs
  • Check and repair system files
  • Use an anti-malware tool


DaRT Version Information

  • DaRT 8.1 supports Windows 8.1 and Windows Server 2012 R2.
  • DaRT 8.0 supports Windows 8 and Windows Server 2012.
  • DaRT 7.0 supports Windows 7 and Windows Server 2008 R2.
  • DaRT 6.5 supports Windows 7 and Windows Server 2008 R2.
  • DaRT 6.0 supports Windows Vista and Windows Server 2008.
  • DaRT 5.0 supports Windows 2000, Windows XP, and Windows Server 2003.


Although, E.R.D Commander is useful, it is not an easy job for us to remove the password.  If you have difficulty in getting E.R.D Commander, there is another wise choice for you, Use Windows Password Key to recover Administrator password in minutes with easy steps.
1. Log in any available computer that you can access to and allows you download. Download and install Windows Password Key in that computer.
windows password key

2. Burn a password reset disk with the program

3. Insert the created disk to your locked computer, change the bios setup by pressing F2 to make sure your computer can boot from this disk.

4. Choose the account which you want to remove its password.

This program works efficiently, with 100% recovery rate, for those computer newbie to recover administrator password, it is no doubt a wise choice.


Get Windows Password Key Now!

Buy Windows Password Key ($19.95)
Download Windows Password Key Standard


You like the Post?  Then Please Share it...


Thursday, January 30, 2014

Tuesday, January 28, 2014

Unlock & Unhide Windows 7 Hidden Themes

0 comments

Windows 7 ThemesWindows 7 Themes and wallpapers are amazing as compared to Windows vista. Microsoft windows 7 has default 5 theme but Windows 7 beta 1 build 7000 onwards has several hidden & locked themes provided for regional countries such as Australia, Canada, Great Britain, United States and South Africa.

Since these hidden themes are installed along with your Windows 7 installation you can unlock/unhide these hidden Windows 7 Themes for regional countries. Below are three different methods to get Windows 7 hidden themes.

Screenshot of Default Windows 7 Themes

Windows 7 Default Themes

Method 1: Steps to Unlock & Unhide Windows 7 hidden locked Themes

1. Unhide the Windows 7 System and Protected Operating System files from Windows explorer -> Organize -> Folder and Search Options -> view tab
2. Navigate to C:\Windows\Globalization\MCT.
3. Open a MCT-(AU, CA, GB, US, or ZA) folder for the regional theme that you want.
NOTE: AU, CA and ZA regions all have the same themes though.
4. Open the Theme folder in the selected region folder.
5. Select the .theme file to use it.
NOTE: Once you select a .theme file, Windows 7 will save it so that you will be able to change or select this theme again from within the normal Personalization window location.
6. Hide the Windows 7 System and Protected Operating System files.
7. Enjoy your new regional themes!!

Method 2: Using windows 7 Search (Simplest Method)

1. Go to \Windows\winsxs Directory
2. Search for *.theme.
Winsxs Themes
3. Double click themes with name in the format of XX to apply and save the theme.

Method 3: Registry Entry

1. Open notepad and copy past the following lines
Windows Registry Editor Version 5.00
[HKEY_CURRENT_USER\Software\Microsoft\Windows\CurrentVersion\Themes\InstalledThemes\MCT]
“%windir%\\Globalization\\MCT\\MCT-AU\\Theme\\AU.theme”=””
“%windir%\\Globalization\\MCT\\MCT-CA\\Theme\\CA.theme”=””
“%windir%\\Globalization\\MCT\\MCT-GB\\Theme\\GB.theme”=””
“%windir%\\Globalization\\MCT\\MCT-US\\Theme\\US.theme”=””
“%windir%\\Globalization\\MCT\\MCT-ZA\\Theme\\ZA.theme”=””
[HKEY_CURRENT_USER\Software\Microsoft\Windows\CurrentVersion\Explorer\Wallpapers\KnownFolders\Windows Wallpapers\MergeFolders]
“%windir%\\Globalization\\MCT\\MCT-AU\\Wallpaper”=””
“%windir%\\Globalization\\MCT\\MCT-CA\\Wallpaper”=””
“%windir%\\Globalization\\MCT\\MCT-GB\\Wallpaper”=””
“%windir%\\Globalization\\MCT\\MCT-US\\Wallpaper”=””
“%windir%\\Globalization\\MCT\\MCT-ZA\\Wallpaper”=””
2. Save file as allregional.reg on desktop.
3. Double click on allregional.reg to add above registry entry.
4. Now you can access all Windows 7 Hidden & Locked Themes via right clicking on desktop and personalize settings.
We have created allregional.reg file for you, Download allregional.reg and run it on your machine and access hidden Windows 7 Themes instantly.

Screenshot of Unlocked – Unhide Windows 7 Hidden Themes

Unlock & Unhide Windows 7 Hidden & Locked Regional Themes


You like the Post?  Then Please Share it...


Monday, January 27, 2014

How to Translate Subtitle Language in YouTube Captions

0 comments


Captions are only available on videos where the owner has added them, and on certain videos where YouTube automatically provides them.


First you have to turn Captions ON

If a video has captions, you can turn them on by clicking the captions icon at the bottom of the video. Depending on your location, the captions icon will look like one of the following:  or 
To turn them off, click the captions icon, then Turn Captions Off.


Select caption language

Choose different caption languages by clicking the captions icon. If the language you’d like isn’t there, you may want to try auto-translated captions, which uses Google Translate to translate the captions.
Here’s how to enable auto-translated captions:
  1. Click on the captions icon at the bottom of the video
  2. Click Options
  3. Click Translate Captions
  4. Click to select a language
  5. Click OK


You like the Post?  Then Please Share it...


Friday, January 24, 2014

Google Glass Features

0 comments

Google Glass logo


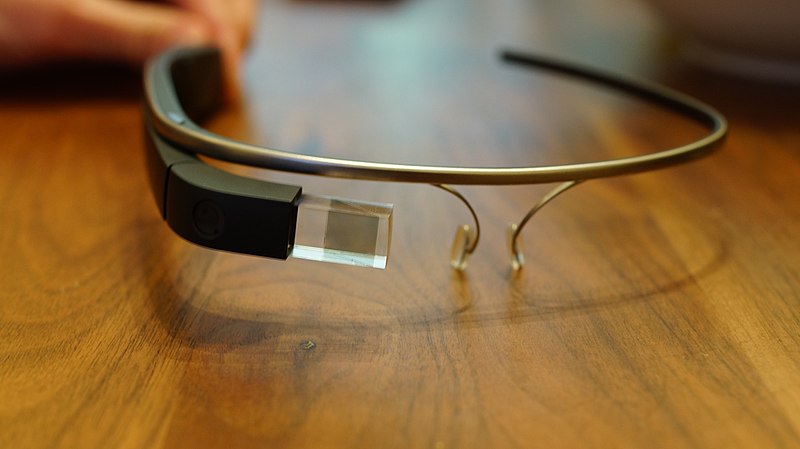
File:Google Glass Explorer Edition.jpeg


What is Google Glass?
Google Glass is a wearable computer with an optical head-mounted display (OHMD) that is being developed by Google in the Project Glass research and development project, with a mission of producing a mass-market ubiquitous computer.Google Glass displays information in a smartphone-like hands-free format, that can communicate with the Internet via natural language voice commands.


Features of Google Glass

Record videos, take pictures
Just say the word and Google Glass will take a picture or record a video – you will never have to touch the hardware. The photos and videos will be stored on the 4GB flash memory of the device, and can also be shared on social networking websites or emailed.


Show messages
Google Glass will show you text messages as well as emails you receive and allow you to reply to them via voice commands.


Find information
If you are in the habit of Googling things a lot, you will find that your task has been made easier by the new Glass. You simply need to ask a question and the device will pull the answer from the internet. For example, you can ask when Taj Mahal was built or to give you a few photographs of the monument and the device will provide appropriate replies on the small screen in front of your eye.


Show maps
The widely used Google Maps are integrated into Glass, so that users will be able to chart the course of their journey or look up locations or establishments via voice commands.


Live video sharing
Google Glass can show the world what you are seeing – live! If you are attending a family function, your child’s school play or a concert, you can share the feed with your friends and family in real-time and make them a part of the experience.


Integrates Google Now
Google Now, the digital voice assistant from the search giant, has been integrated in this device. It will keep track of your daily habits, such as when you leave for office or the route you take. It will give you alternate routes if there is traffic on the way or give you weather updates periodically, among various other functions.


Translate
This is a neat feature that may come in handy when you travel abroad. You simply need to ask Google Glass to translate a phrase or sentence from one language to another and it will speak that out.


You like the Post?  Then Please Share it...


Wednesday, January 22, 2014

How to Run Android Apps on a PC Using Bluestacks

0 comments


BlueStacks App Player is a versatile program that bridges the gap between mobile and desktop by allowing users to run their favorite Android apps on their Windows or Mac OS X devices. An innovative "Cloud Connect" feature allows you to push apps from your Android device to Bluestacks, and vice versa. First released to the public in 2011, the program has continued to grow, and is currently free for download in its current beta form. Want to get a taste of Android on your desktop? Here's how to set up BlueStacks, as well as a rundown of some of its controls and interesting features.

1. Installing BlueStacks

BlueStacks App Player is available for Windows and OSX computers, and is a quick, compact install to your boot drive (there's no option in the installer to go to a different drive or directory). The only choice you make during the install is whether to allow the program to make notifications, as well as the option to opt in to BlueStacks Spotlight, which holds daily app giveaways.

2. The Home Screen

Once installed, BlueStacks will boot up to its Home Screen, where you can access your installed apps, look up apps in the "Top Charts," search for apps, and access settings. You can use the mouse for basic touch controls here, with clicking and holding to simulate basic tap and swipe controls. From here, we'll need to do a bit more setup before you can get around to installing apps. You'll need to set up access to the Google Play store and associate a Google Account with BlueStacks.

3. Setting up the App Store

With BlueStacks installed, the first thing you'll want to do is associate a Google Account so that you can get onto the Google Play store and download apps. Go to "My Apps" and click on "1-Click Sync Setup," which will bring up a wizard interface that will guide you through the process. Basically, you'll need to either create a Google account, or sign in with your existing one.

4. Setting up BlueStacks Cloud Connect

An optional step for users with an Android smartphone or tablet is to set up BlueStacks Cloud Connect, an app that allows you to push apps from your Android device to BlueStacks, and vice versa. Download Cloud Connect for your Android device, and then go to the Settings button on BlueStacks and click on "Cloud Connect".
If you have an Android phone, input an email address as well as your phone number. You will then receive instructions via email and SMS on how to connect your phone to Bluestacks, push apps, and sync SMS.
If you're running an Android tablet, you instead just use an email address to synch BlueStacks with your device. After registering BlueStacks Cloud Connect, you should receive an email containing a PIN number, which you input into the Cloud Connect app.
You should now be able to push apps between your device and BlueStacks. You're essentially istalling the same app on your desktop and mobile device, without syncing app data (such as login credentials or game progress). Still, it's an easy way to copy apps from your device to BlueStacks, or vice versa.

5. Installing & Running Apps

If you're not going to sync apps to and from your Android device, you can just use the built in App Search to search for and install apps from Google Play, Amazon, or 1Mobile.
It may seem confusing at first, but BlueStacks won't let you get to its three built-in app markets directly. You'll need to go through the App Search button. Type in the name of the app you're looking for, and it will search 1Mobile, Amazon, and Google Play for matches, and give you the option to install apps from any of the above three stores.
Once you've accessed one of the three app stores, you can then navigate that store. Within Google Play, for instance, you can take advantage of the store's search and other features.
Once you return to the Home Screen, your newly installed app should be ready to run. BlueStacks can run an impressive variety of apps from social networking tools and multimedia apps to games. However, BlueStacks won't run everything, so expect a little trial and error for compatibility.

6. Controls & Settings

You should now have everything you need to install and run apps from BlueStacks, so we'll finish up with some extra notes on in-app controls, as well as settings. Unless you happen to be running a touchscreen rig or a Windows 8 tablet, you're going to need some way to approximate pinch to zoom, as well as tilt controls.
Pinch to Zoom: Control +, or Control -
Tilt Controls: 'Z' or 'X' can be used to simulate tilting a device left or right.
BlueStacks supports the use of gamepad controls for many apps, which will be a godsend for users looking to play Android games on a PC. Plug in your controller, and Bluestacks should inform you if a particular app supports a controller.
Finally, the Settings menu (gear icon) contains assorted system settings for language, keyboard settings, contacts and account management, and an app manager for uninstalling applications and setting their default sizes.
There's your quick visual tour of the BlueStacks App Player. It may not run every Android app perfectly, but BlueStacks puts you just a mouse click away from thousands of compelling choices.


You like the Post?  Then Please Share it...