Saturday, November 23, 2013

Download And Convert Youtube Videos Online!

0 comments

A free online media recorder application, which
allows you to record and convert nearly any audio
or video URL (YouTube, MySpace,
Veoh...) to common formats.


Thanks for coming by and taking your time to read this post :) I hope you have learnt something today and shared this. Now I'd love to hear from you. Got any views, thoughts and questions related to the post? I'm all ears here. Add your comment.

Thursday, November 21, 2013

Simple Startup Password: Set Password for Google Chrome

0 comments

Google Chrome, nowadays is the most used browser and with the launch of Chrome books, Google chrome would be the most certain choice when it comes to browsers. If Chrome is your default browser, then it is very certain that it may contain very private information which might be confidential and not to be shared with anyone. Sometimes, your friend, your bro or sis or whoever accesses your computer(or laptop) and opens up Chrome. Then he or she might just check out your private information. You might be thinking is there a way to get out from this prob. Let me give you some relief by saying, Yes there is!
Simple Startup Password is a Google Chrome extension which password protects you’re browser. It asks for a password every time you start Google Chrome.

Are you wondering how to set the password? Don’t wonder, read on!
1. Install the extension from here .
2. Click on the ‘wrench’ icon –>  tools –> extensions.
3. Find “Simple Startup Password” and click on “Options”.
4. Set the password.

Now, the next time you open Google Chrome, you will see a text box asking for the password.
This plugin is necessary in order to protect your browser from use by unauthorized persons. This extension is nice and easy to use.
If you want to change the password you can change it in the same way you used when you set the password. Using this extension no unauthorized person can get the opportunity to access your Google Chrome and all your private documents would remain private.


Thanks for coming by and taking your time to read this post :) I hope you have learnt something today and shared this. Now I'd love to hear from you. Got any views, thoughts and questions related to the post? I'm all ears here. Add your comment.

Tuesday, November 19, 2013

How to find out IP Address and Tracing Facebook User

0 comments


facebook

Someone has made your fake account…. Don’t Worry…..


First you got to find out the IP address of that User.
To Do so we will be using “netstat” command in windows. If you want to know the IP address of a specific person on facebook or orkut or any chat service, there is only one way: Just invite or ping him for a chat and while chat is ON open ‘Command Prompt‘ on your PC (Start >Run>cmd).

Note: before trying this make sure you close all the other tabs in your browser. and only facebook is
open. also if possible delete all the history and cache from your browser.
When command prompt opens Type the following command and hit Enter.

netstat -an

And you will get all established connections IP addresses there. Note down all the suspicious IP’s.

The Next Step is to Trace that user using his IP address.
To do so we will be using IP tracer service. Go to the below address and paste the IP address in the box that says “lookup this ip or website”. and it will show you the location of the user.

It will show you all the information about that user along with his ISP and a Location in the MAP. Now
in the MAP Just click on “click for big ip address location” in the big picture you can actually zoom
in. and try to recognize the area. If any serious matter just note down the ISP details in that page and contact them about the IP. they will respond you.


Other netstat commands:
-a   Displays all connections and listening ports.
-e   Displays Ethernet statistics. This may be combined with the -s option.
-n   Displays addresses and port numbers in numerical form.
-p   proto Shows connections for the protocol specified by proto; proto may be TCP or UDP.
-s   option to display per-protocol statistics, proto may be TCP, UDP, or IP.
-r   Displays the routing table.
-s   Displays per-protocol statistics. By default, statistics are shown for TCP, UDP and IP; the
-p   option may be used to specify a subset of the default.


Thanks for coming by and taking your time to read this post :) I hope you have learnt something today and shared this. Now I'd love to hear from you. Got any views, thoughts and questions related to the post? I'm all ears here. Add your comment.


Friday, November 15, 2013

Top 10 Websites with their Launch Year

0 comments

* Google : Sept 4, 1998

* Facebook : Feb 4, 2004

* YouTube : Feb 14, 2005

* Yahoo ! : March 1994

* Baidu : Jan 1, 2000

* Wikipedia : Jan 15, 2001

* Windows Live : Nov 1, 2005

* Amazon.com : 1994

* Tencent QQ : February 1999

* Twitter : March 21, 2006


You like the Post?  Then Please Share it...


How to Use Keyboard as Mouse

0 comments

If your mouse is not working and you don't wish to wait till you get a new mouse, you would definitely like
to know how you can use your keyboard as your mouse. It is
easy to use your mouse as keyboard in windows using the
On Screen Keyboard utility, but it is also possible to do the reverse
All you need to do is:
Windows 8, Windows 7 and Vista Users:

1. Open Ease of Access Center by clicking the Start button , clicking Control Panel, clicking Ease of Access, and then clicking Ease of Access Center.

2. Click Make the mouse easier to use.

3. Under Control the mouse with the keyboard, select the
Turn on Mouse Keys check box.
You can also increase the acceleration and speed of your
mouse movements according to your needs.
You can alternately press the Alt+Shift+Num Lock
combination to instantly activate the mouse keys.
For laptops, this will only work if your laptop keyboard has a numeric keypad or alternative keys which you can enable by pressing the Number Lock Key or the Function
key.
On my laptop number 6 key of the numeric keypad moves the mouse pointer left, number 4 key moves the
mouse pointer right, number 2 key moves it down, number 8 key moves the mouse pointer up, number 5 and + key serve as right click while the number 0 key works as left click.


You like the Post?  Then Please Share it...


Thursday, November 14, 2013

How To Resume Broken Links with IDM (InternetDownloadManager)

0 comments

Five Best Tricks to resume broken links in IDM
Nowdays IDM is the most widely used download manager because of its capability to download files at a faster rate than compared to that of any

browser or any other download manager.Not only download at a faster rate idm can also resume links at a later time which is the most important feature

of the idm.But sometimes an error occurs when we try to resume the download .We get frustrated when the file has already been downloaded more than

50%. and the message appears “Do you want to download the file from the beginning”.


It happened due to the several facts & problems: -
# When server stopped responding

# Your Internet connection has problems

# You manually pause it

# Stopped it to download it later some times.while you know it has the capability of resuming.

# IDM failed, when it send the request to download it where it has stopped.

Response of the IDM was “Do you want to download it from the beginning “. Definately you don’t want to download it from the beginning while you have

downloaded 1 GB or more. There are the tips and tricks to download the file from where IDM has stopped or you had paused it.Some of the ways are

given below to resume the downloads.

First Trick
1. Firstly open idm and there right click the file you want to download.

2.Click on resume the download.Some thing like below appears thereafter.


Posted Image

3. Now right click on the download you want to resume and select properties.

Posted Image

4. Then copy the Address and paste it in a web browser. Then right click on the Copy the Link Location and copy the newly generated link..

Posted Image
5. Then in the Properties of the Download in the Internet Download Manager. Copy that link to the Address value.

Posted Image
6. Now go to the Download list and select resume download.

Posted Image
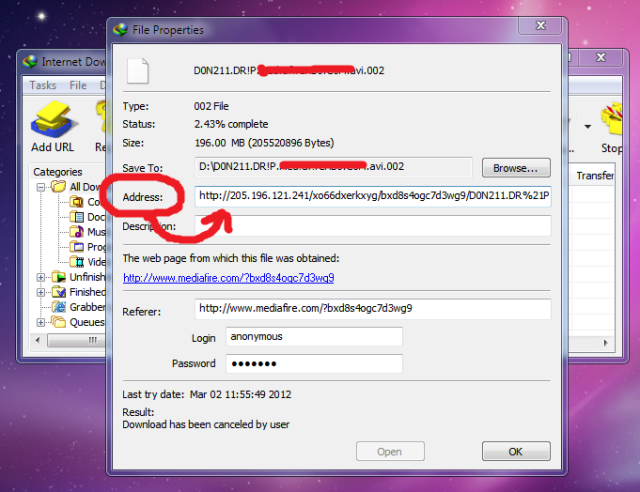
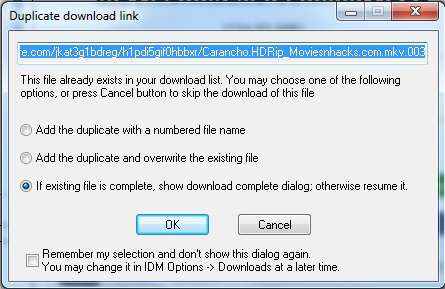
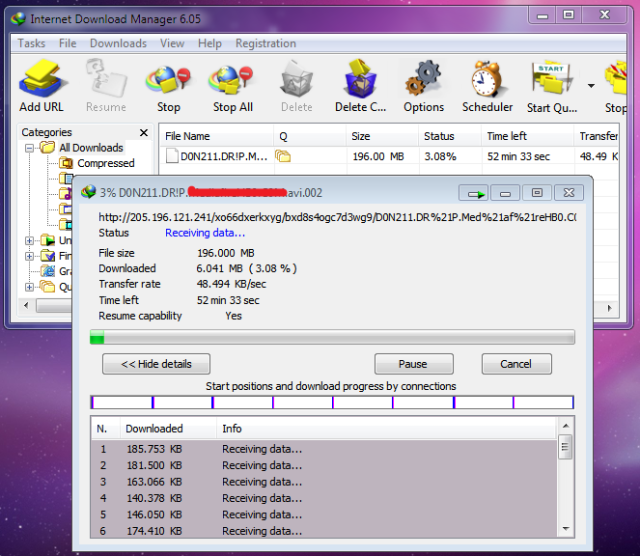
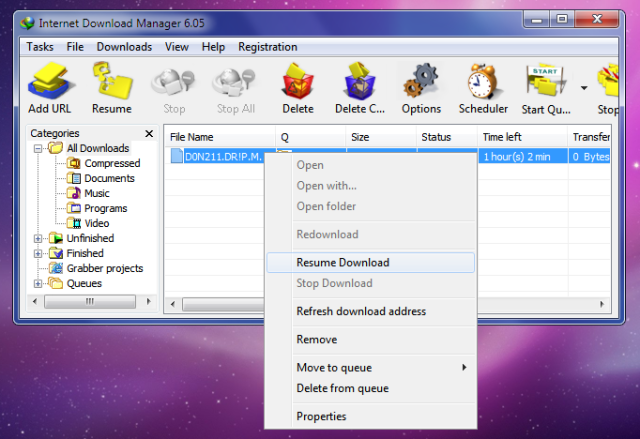
7. That’s it. Now you’ll see the download will resume..Posted Image

Posted Image

Ok Now you can enjoy your downloading…. Posted Image

Second Trick1. Open the same file in the browser, click to download it again, when dialogue window appear select to “download it later”. (Check to ensure that the file must have the same file size and from the same link/server).

2. Open IDM manager window and double click the file you have selected to “download later”

3. Select the full address field and press ctrl+c to copy to the clipboard.

4. Now, double click the file which has not been resuming and paste the address there which you have copied earlier in the address field press ok.

5. In the IDM manager window click the file and press resume. 90% of the resuming problems has been resolved by this little tip and trick.
Third Trick
This trick is for those who get the error” Probably this site uses temporary links that cannot be requested twice or expire after some time when session is completed.”
1. Right click on file you want to download.

Posted Image
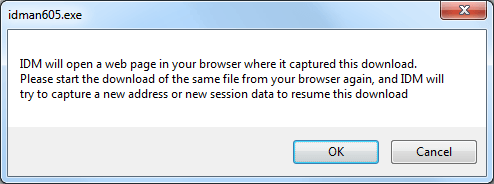
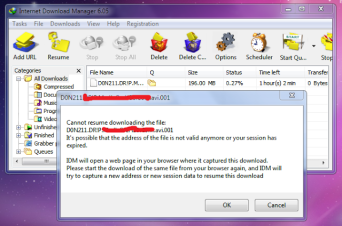
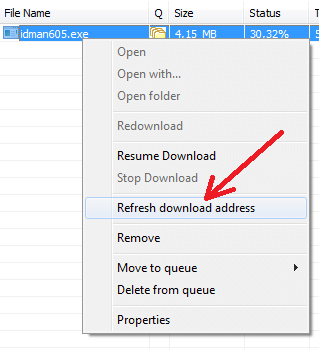
2. Then IDM will show the following dialog and will try to open a web page where you found initial download link. If IDM fails to open correct web page, or recognize a download link, open

correct web page manually in your browser. 


Posted Image

Posted Image

3. On this page, start downloading the same link again. IDM will detect that this is the new link that it is waiting for and show the following message.

Posted Image
If IDM fails to recognize a link, it will ask you if this is a new download link that it waiting for.

Posted Image

Then you can resume the download.
Trick FourThis is for those who fail after using the above steps. In these cases the file is actually removed from the link you were provided. So you cannot resume file from there.Follow the following

steps to resume the file in such cases
1. Firstly go to the idm and right click on the file you want to resume.After that click on resume download .Something like below image will appear

Posted Image
2. Wait for some time until it says that it will open a web page Click on Ok. 

Posted Image

Posted Image

3. Here comes the main part of the trick . IDM will open a web page where no file would be found.Then search the same file on other sites and get a new link for the same file. Remember that

the file size should be same. Name and Address of the file may be different.
4. After that click on the new link to download the same file from different address.Then IDM will ask you if this the new address for your expired download.Click on Yes

Posted Image
5.Sometime IDM will ask you about the file name which may be different on the different server.Click on Yes to save the file with the new name received from the otherlink or server.

6.It may also ask from you about the duplicate link.Click on third option “to resume the file”.

Posted Image

7. Now the file should resume from the point you left.
Trick Five
This trick is for those people who get the resume capability as NO very often while downloading specially from online sites like You Tube ,Daily Motion etc.
1. Firstly start the download .If resume capability is Yes then it is wonderful .If it is no let us convert it into Yes.

2. For that firstly stop that download and go to IDM.

3. Then open the options tab in the IDM panel .

4. Click on CONNECTION .Then select max number of connections. It should be set to 8 or 16.Change its value to 1.Press OK.

5. Then restart the download again and now you must get its resume capability as YES. One more fact that your speed

will not become very less as compared to original download speed.

6. After downloading the specific file again go to the same settings and change the max no of connections to 8 or 16

Posted Image


You like the Post?  Then Please Share it...


Log out your Facebook Account from other Computers

0 comments

Sometimes we go cyber cafe or any other place..
and open facebook... and we forgot to log out....but dont need to be worry about it,,,there is
a option to log out your account from every computer.....follow the steps...

1. log in your account (from anywhere)

2. go to account setting

3. click on account security

4. and see there details...its shows
Last Accessed:
Location:
Device Type:
"see the image"
(if only these 3 things are shown there, then u r safe)

but
if there is an option to "end activity"that means your account is opened somewhere else also...
click "end activity" and u`ll be logged out from other computers


You like the Post?  Then Please Share it...