Thursday, February 20, 2014

Add Files To iPhone Without iTunes Using VLC

0 comments

Apple has always been known for putting restrictions on their users such as bluetooth connectivity availability  iPhone to iPhone only , Sharing files between iPhone and computer on same system where it was initially installed , Requirement of iTunes software for transfer of music between your iphone and computer etc. Nobody in this world want to live in any kind of restrictions. If you own a phone then it should work completely as you want it to work. Although it is not possible to remove all the restrictions from iPhone because developers of iOS firmware are very strictly concerned about the security of your iPhone and do not allow any app to take control over it and bypass the limits of apple still , there are some tricks which enable users some more functionality other than their default functions. Here I am going to reveal a similar trick by using which you can add your files to VLC Media player without using iTunes.

Sometimes there is a situation when you are at your friend's home and there is some good video song in his computer which you want in your iPhone but there is no iTunes installed in his computer , Now what to do ?
So the best solution to all such kind of problems is switch to VLC.

THERE ARE A FEW SIMPLE STEPS TO DO THIS :

1. Firstly you need to have the VLC media player installed on your iOS device and also on the system from where you want the share the data .

2. Open the VLC for iPhone app and click on the button situated at the top left corner of the app as shown in following screenshot :


3. When you click on top left button , you will see a several options. Now , turn the WIfi Upload button ON and carefully note of the IP address and port combination the app assigns you.


4. Up to this step , you are all done with set up on your phone. Now open the browser in your computer and enter exactly the IP address with the Port number in the address bar which you have noted down earlier.


5. So this is the last step , here you just need to Drag and Drop the media file which you want to save in your phone  in this browser window and the file will be transferred to your iPhone within a few seconds depending on the size of file. 

So this was probably the most easiest and convenient way for transferring files between a computer without iTunes and your iPhone.


Tips And Tricks For Apple IOS 7

0 comments

Apple has launched their latest firmware ios 7 with lots of new and exciting features , a cool user interface and a very attractive design and looks of icons. The latest version of Apple's mobile platform has been met with mixed feelings by critics, Apple has made it clear that this is the way it's going to be - no matter if you like it or not. With hopes that it's all a matter of getting used to, and that Apple has been polishing and improving its software since the early betas It is free and available for download from 18th September 2013. This new firmware is already installed by many apple users and they are using it happily but many of you dont know some hidden tricks of this new operating system.

SOME PROS OF IOS 7 :

  • Multiple pages of apps within folders.
  • The default weather app–shows animations of the current weather in your area.

SOME CONS OF IOS 7 :

  • The lag time when switching between apps “the old way.” While the animation does make for a cooler look, it makes the overall experience seem a little slower.
  • The new operating system makes his iPhone look like a Droid.

 IOS 7 TIPS AND TRICKS


1. MULTIPLE PAGES OF APPS INSIDE FOLDER

Apple ios 7 allows it's users to create many pages of apps inside any folder and to slide to switch between those different pages.


If you want to move apps between different screens the you should simply Tap and Hold the app icon , wait the phone to vibrate and then Drag the icon to desired screen where you want to place it and release the icon once the icon reaches place of your wish.

2. MULTITASK AND SWITCH APPS IN IOS 7

You can perform multitasking in ios 7 , thanks to the powerful processor which is always been a great feature of all apple phones. For experiencing multitasking feature in ios 7 just double click the home button i.e. the small round shaped button located on the bottom front on your iPhone and slide to easily switch between apps.


3. CLOSING A RUNNING APP WITHOUT OPENING IT

If you wish to close any application from the stack of running apps then you can simply drag that app upwards from the apps being displayed on the screen as shown in below screenshot.


4. SWIPE UP FOR CONTROL CENTER

The new swipe up feature for the iOS7 Control Center makes it much simple to swipe up and run control center unlike iOS6 where it needed  multiple clicks in order to reach control center . What used to be Settings > Brightness is now a swipe up from the bottom of the screen and a quick drag of a slider.

My favorite features of the Control Center are the flashlight, wi-fi settings, airplane mode , Bluetooth settings and screen orientation. It is much similar to that Notification Panel present in Android devices which gives freedom to user to change and manage the settings of phone anytime as per their requirements.The Control Center is available from any screen in iOS7, including the lock screen.


Here’s a full list of the features you’ll find in your control center:
  • Airplane mode
  • Wi-fi
  • Bluetooth
  • Do Not Disturb
  • Screen Orientation
  • Brightness
  • Music Controls
  • Airdrop and Airplay
  • Flashlight
  • Timer
  • Calculator
  • Camera

5. SWIPE DOWN FOR NOTIFICATION

As similar to it's preceding ios , in the latest version of ios 7 the notification bar can be seen by swiping it down from the top of the screen. Here you can see notifications in several different categories such as TODAY , ALL , MISSED ,  

6. QUICK SEARCH

In earlier versions of ios , you had to scroll to the left in order to reach the last screen for using search feature. But ios 7 provides this search feature from any home screen. All you have to do is simply pull down the home screen and the search bar will be displayed.


I hope all these tricks will improve your experience of using new ios 7.


Top 3 Ways To Download Web Videos To iPhone For Free

0 comments

iPhone users ever wanted to save videos from web to your phone ?
Many times there is a situation when one of your friend share some interesting or funny video in their Facebook profiles or send you link of Youtube to take a look of the video. iPhone doesn't provide any default application in iOS for saving web videos for watching them later while you are offline so far. Android users are more happy in this concern because they have number of apps available in Android Market for Downloading Videos From Web but it is not the case with iPhone users. Still there are a few good apps available in iPhone App Store to solve this purpose.

Here I am providing you top 3 Apps for downloading / Saving videos available on web to your iPhone.

1. USING VIDEO DOWNLOADER


For installing Download manager to your iphone , go to the Apple App Store and search for "Video downloader - download manager". Make sure that you include the '-' so the app will appear first in the list of results. There are many other similar apps available in App Store, so if you don't like this one, others work in  the same way.

The app is free to install so you can easily download it in your iphone. There is also a paid-for Pro version of the app, and you will see some pop ups prompting you to upgrade each time you launch this app, but the app continues to perform its job of downloading for you.


HOW TO DOWNLOAD VIDEOS USING VIDEO-MANAGER

Launch the Video Manager app , default Browser of your phone will then open on help page. If you can't see it, swipe down to display the familiar address and search bar. Search for YouTube and then tap the site which you want to select from the list of results.


Tap on the magnifying glass button to search for video on YouTube. When you find the one you want to download, start playing it. As soon as you start playing video you will see a popup message asking you to Download video but in some other versions if you don't see any option for downloading video there would be an option for cache. It will save video to some different folder than downloads.


Video will be downloaded and saved to your phone.

2. USING VDOWNLOAD


VDownload  app has a built-in web browser where you can download or browse videos from certain websites at the same time. There are two ways to download videos using this app but these methods may vary from one site to another so you have to try both the methods.

METHOD 1 :

While browsing the video , go to the video which you want to download and then tap on the middle button of browser present at bottom of the screen and then click on Save video.


METHOD 2 :

In some websites you wont get the direct option to Save video. To download videos from such sites first you need to Play The Video and then you will get the option of Cache Video To Memory.


You can see your download progress by tapping on the Downloads button. Once it is finished, you can find and watch it under Videos. The videos saved in your phone will be with some Random names but you can simply rename them and save them to your gallery by using option Save To Albums.


3. USING MX TUBE ( YOUR IPHONE MUST BE JAILBREAKED IN ORDER TO USE THIS APP )


MX Tube is another one of the best app for downloading videos from web. The best part is that it is supported by many lower versions of ios as well. This app is able to download videos to your iphone / ipod directly from web.
  • Run the MX Tube in your phone.
  • Search for the video you are looking to download inside this app.
  • Click on the desired video and select the quality in which you want it to be saved in your phone.
  • Once you select the quality , download will start along with a cancel button in case you change your mind.
  • After downloading , to view the video go to Videos tab under this app and enjoy.

I hope atleast one from the above given tricks will work for your iphone / ipod. But if you know some better tricks or apps for doing this task , feel free to comment below.


Recover Lost Contacts In iPhone

0 comments

Nobody want to lose their data saved in phone. Whether it is some multimedia file like audio , video , pictures or important documents like their Contacts , Notes , Official documents , Bookmarks. Everything is just equally important to the user. But as technology is very unpredictable and prone to errors , sometimes there is a situation when your phone stop functioning properly and you might lose all data stored in it. For such situations it is always necessary to keep backup of your important data on some other secondary storage device or in your computer.

There are a few methods to save your data from being lost and also to recover it , in case you lose it.
Here I am sharing with you best ways for doing so.

RECOVERY USING ITUNES

By using iTunes , you can recover your lost contacts in few simple steps but only if you have created a backup of your phone earlier. So to get back your contacts just follow these steps :
  •  Run iTunes on your computer
  •  Connect your iPhone to computer and sync it normally as you always do
  •  At the left pane in iTunes application window , locate your iphone under Devices column
  •  Now right click on the iPhone icon if you are a windows OS user or press crtl and click if you are MAC user and then select Restore From Backup.
  •  Select one of the Backup version from the Drop down menu & Click on Restore button. It will restore all contacts in your phone since the last sync.
  • Now you may disconnect your phone and check if contacts are restored.

RECOVERY USING BACKUP OR ARCHIVE

This is the method of recovering your contacts from Archive file of address book. For doing this :
  • Open the Address book application from the File menu & select Import and then Address book archive.This will import most previous archive of your contacts.
  • Now simply Import contacts from backups by navigating to the Application support / Address book folder of your most recent backup.
  • To verify that if it contains your contacts , Open this folder and copy your address book folder and paste it to same path in your computer then it will ask to replace some folders and files , do it . This will restore the data in your computer.

 RECOVERY USING SPECIALIZED SOFTWARES

If you are not much familiar with using above mentioned manual procedures for recovery , you need not to worry because there are several specialized automated softwares available over internet for performing recovery for you. Dr Fone from Wondershare is one of the best recovery software available today and you can try it to solve your purpose. The best part is your phone dont need to be rooted to use this software and it comes with a user friendly and attractive interface which makes your work much easier.It is available for both WIndows and Mac users.

Windows users may download it from here : DOWNLOAD FOR WINDOWS

Mac users may download it from here : DOWNLOAD FOR MAC

HOW TO RECOVER USING WONDERSHARE DR. FONE

1. Download and Install Dr. Fone from links mentioned above and run it in your computer.
2. It provides two modes for recover i.e. Recovery from iTunes file & Recovery From ios File
3. Choose the mode for recovery and connect your phone to computer.
4. To recover from ios device
  • Hold your iphone in one hand and click on Start button of Dr fone software.
  • Press and hold Power and Home button of your phone simultaneously for 10 seconds.
  • After 10 seconds release the Power button but keep on holding the Home button until you see message of successfully detection of your phone.
  • Now it will list all the data of your phone including contacts.
  • You may preview and recover the contacts now.
I hope the above information will help you to recover your lost contacts back to your phone. It is always recommended to keep a backup of all your necessary data to some safe place.


How to Hide Last Seen Status on Whatsapp

0 comments

Whatsapp is used by almost everyone who owns a smartphone today. The reason behind its success is simplicity of app and number of features provided by it. It is an instant messaging application which has now updated with time and able to send and receive voice messages as well. Apart from just voice and text messages it is capable of sharing multimedia files like videos , images , songs etc. Because of these features Whatsapp has became much popular.

But it also has a feature which irritates many users i .e. LAST SEEN. So here i will tell you a trick to escape from the time stamp of whatsapp's Last seen feature.


Hide Last Seen In iphone :

In iphone there is a default setting to enable and disable the last seen timestamp of whatsapp messenger which makes it much more easier to hide your last seen status on whatsapp and you dont need to download and install any third party application to hide your last seen status from others.

All you need to do it to upgrade your application to latest version available because the latest update of Whatsapp for Iphone have “Last Seen Timestamp” option. So simply go Settings>> Advanced>>Last Seen Timestamp and turn it OFF.


Hide Last seen in Android :

If you are an Android OS user then there are two methods by which you can hide your last seen status. But they really seems nothing as compared to the above mentioned feature of iphone. But still if you want to get rid of this last seen time stamp you must follow one of these methods.

METHOD 1 - USING NOT LAST SEEN APP :


This is an app of android which disables the network packet data when you wish to hide your last seen status. But the drawback of app is that you can not hide your status while you wish to chat with someone for long time.

Because this app basically disconnects your handset from packet data when you enter whatsapp, so servers of whatsapp dont get your status that you are using it and then after reading the messages when you close the whatsapp , it again enables the internet active automatically so in this way you get to read the messages from your contacts without being noticed by whatsapp servers and hence your last seen status is not updated.

You can download Not last seen app for your android phone from here : DOWNLOAD


METHOD 2 - MANUALLY


1. Go to settings and Disable your cellphone’s Interent and Wifi.
2. Open Whatsapp. Read and send messages.
3. Close Whatsapp, now enable Internet and Wifi. 

As soon as the Internet connectivity re-initialized , Whatsapp will synchronize with the servers and the messages will be sent without the server getting to know your last online status update.

Unfortunately for our Blackberry and Windows phone users, there is no such method other than Manual at this moment. However in the past, Blackberry had an app known as OpenWhatsapp for hiding Last Seen, but it has been discontinued by its developers. But stay tuned, we will find some trick for these two very soon.


Tuesday, February 18, 2014

Need For Speed Rivals

0 comments


NEED FOR SPEED RIVALS - DDE & inFAMOUS Repack


Digital Deluxe Edition! 

• All-drive: Imagine your race and your friend’s pursuit colliding—creating a world where no two events feel the same. Don’t want to play with others? Then simply choose to make Redview County yours alone and dominate the advanced Racer and Cop AI.

• High-stakes rivalry: Racers are lone wolves out for glory; driving agile cars built for high-speed racing and epic chases. Cops work in teams to hunt down and bust racers using the full power of the police force. Switch roles whenever you like, and watch the stakes grow through a new scoring system that puts your speed points on the line.

• Next-gen racing: Experience speed that you can truly feel in the fastest racing game around, powered by the Frostbite 3 engine. Every detail of the game world is rendered in stunning, high-definition graphics. Race and chase in snow, hail, rain, dust storms and heavy fog.

Download :

Unlocked Version - Total Size : 9.1GB (This is the Digital Deluxe Edition)


Upafile :

[Phonegadgetz.blogspot.com]nfsrivals.part10.rar - 161MB
Password : eagle3zio.blogspot.com
RAR Password : www.rld-games.net


Putlocker
BillionUploads
Requires "Origin" Software to be installed and logged in.
RAR Pass : eagle3zio.blogspot.com


Thanks for coming by and taking your time to read this post :) I hope you have learnt something today and shared this. Now I'd love to hear from you. Got any views, thoughts and questions related to the post? I'm all ears here. Add your comment.


Monday, February 17, 2014

Project Zomboid - Early Access

0 comments

PROJECT ZOMBOID - EARLY ACCESS - SANTA


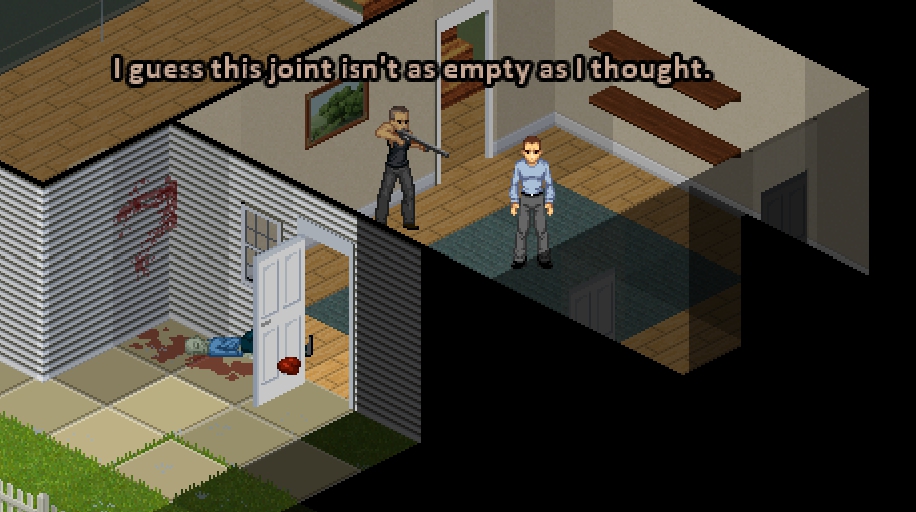
Project Zomboid is an open-ended zombie-infested sandbox. It asks one simple question – how will you die? In the towns of Muldraugh and West Point, survivors must loot houses, build defences and do their utmost to delay their inevitable death day by day.

Download :

Host : Putlocker Only | Early Acces! | Total Size : 500MB
Single Link - Putlocker